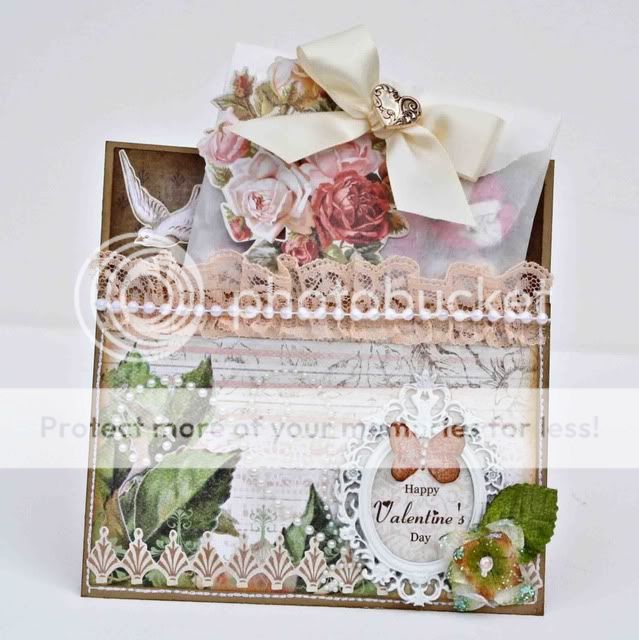
As promised yesterday, I prepared a tutorial for my Valentine's Day card/treat pocket. This was very easy and quick to create and make a great teacher gift. Enjoy!
Before we begin, please excuse the bad lighting, I normally scrap late at night :) I began by scoring a glassine bag an inch from the top, then measuring the rest of my bag. I knew I wanted my bag to stick out a little bit for a more handmade look. The bag I'm using is 7X4.5 and was purchased on Ebay.
I then cut a piece of brown cardstock that measured 6X10 and scored it at 4 inches. That will create a pocket that is 6 inches tall in the back and 4 inches tall in the front to nicely display our bag of treats.
Next, cut two pieces of coordinating pattern papers a quarter of an inch smaller for each panel. That means we'll need a piece of paper that measures 3.75X5.75 for the front and a second piece of pattern paper that measures 5.75X5.75 for the back panel.
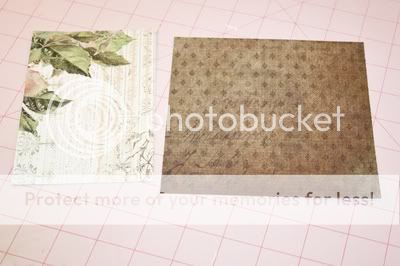
I inked both pieces of paper with Tea Dye Distress Ink before adhering. I also used hot glue to attach some lace to the front border.
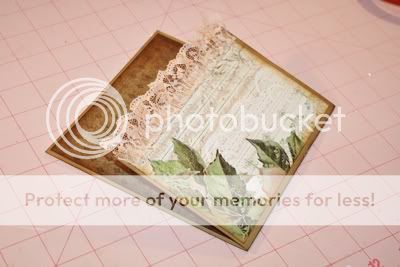
Instead of glue, I used my sewing machine to stitch around the bottom and sides of my pocket.
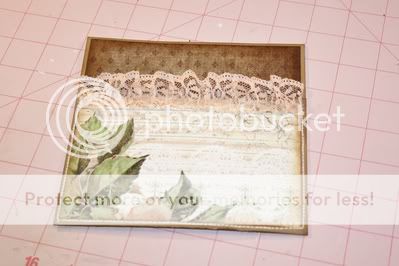
Our pocket is ready! We can now decorate as desired. I used pearls, rub-bons, flowers and Prima metal frame. The sentiment inside the frame was printed onto pattern paper by combining two different font styles from my computer. I also decorated the bag after filling it up with Dove milk chocolates.
I hope you liked this tutorial. I really enjoyed creating this fun pocket, and I hope you give it a try!
Showing posts with label Cards. Show all posts
Wednesday, February 8, 2012
Sunday, March 6, 2011
Coordinates Collections Party Time Reveal and Farewell
At Coordinates Collections, each new month brings a new kit and a new reveal. This reveal will be my last. After much thought and consideration, I decided to step down from my DT position at CC. Changes can be scary but can also be the right thing too. This was a really difficult decision. I have truly loved being a part of the team at Coordinates Collections.
With that said, I was lucky to have the Party Time kit be my last. This kit includes fun Fancy Pants and Jillibean Soup products and were just what I needed to scrap some birthday photos of my little guy's first birthday.
And lastly, I have a card made with some scraps. As you can see I only used the Fancy Pants papers, my favorites. I still have all of the Jillibean Soup papers left to make another layout! The flower you see here was made with the Maya Road pleaded ribbon included in the kit. That ribbon is so fabulous and versatile, I want it in every color now!
With that said, I was lucky to have the Party Time kit be my last. This kit includes fun Fancy Pants and Jillibean Soup products and were just what I needed to scrap some birthday photos of my little guy's first birthday.
My first layout features a photo we took during Dylan's birthday party last year. That was a pretty hectic day and we weren't able to get great photos but I really liked this particular shot. Because it was such a special ocassion, I made sure to include handwritten journaling, which I rarely do!
To keep things simple, for my second layout, I used the same border punches and supplies. This made my pages come toghether incredibly fast. Here he is on the actual day of his first birthday enjoying a cake and lots of love.
To see what the other Design Team members created with this and the other kit of the month, visit the Kit Ideas page at CC. Thanks so much for coming to visit today. I do hope you enjoy what's left of the weekend and get some time to get crafty!
Hugs,
Jolaine
Saturday, August 7, 2010
Greetings From Abroad!
I'm currently not home, but since I have my computer with me, I figured I'd post pictures of some projects I created before I left. These were all done using Bo Bunny supplies, I just love their papers and embellies!
Just Me and My Dad
I misted the burlap here with Wheatfields Glimmer Mist to give it a richer color and shimmery texture. To add dimension to the title sticker, I added Glossy Accents to 'me' and 'dad'; that really made a difference. I also made a little tear on the paper and stapled it to add to the rugged feel!
To create these custom buttons, I just covered a few clear buttons with Glossy Accents and adhered them to patterern paper.
I also gave cards a try for the first time. These were very quick to make! For this one, I folded the paper and cut half a circle with my Coluzzle. I then used my shaped scizzors to add the wavy border.
For this other one, I layered some paper and placed the cardstock flower on dimensionals. I also cut up the black swirl to work with my design.
Take care guys! And thanks for stopping by!!!
Friday, July 2, 2010
June Dress Form Tag Swap
This month I participated in my first tag swap. It was so much fun! The swap was hosted by Marie over at The Pretty Paper Boutique. Our challenge was to make a tag that included a dress form, stitching and items that would be found at a sewing shop.
I wanted to make my tag functional so I designed a corset-style pouch so the recipient would have the choice of using it as a card, or even as a pocket or page in a mini album. To make it shabby chic, I used products by Girl Paperie's Paper Girl collection. Thanks so much for hosting Marie, this was so much fun! I can't wait to get my tags from the other talented ladies in my group!
Thanks for looking! Hope you are enjoying this gorgeous summer day!
Subscribe to:
Posts (Atom)


